
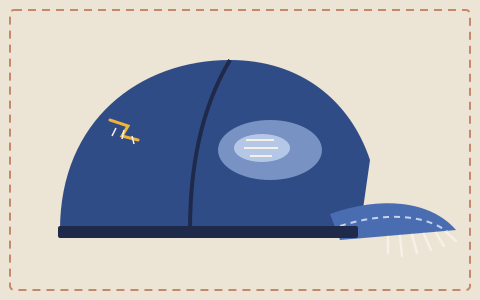
What a distressed finish is
A distressed cap is one that has been made to look worn before anyone has worn it. The look usually combines three things: fraying, where cut or abraded edges release loose threads; fading, where colour is removed unevenly so that raised areas and edges look paler; and abrasion, where the surface has been scuffed so that the weave shows through, sometimes as far as small holes or "rips". On caps, the usual places are the edge of the peak, the front panels and the seams, which are the places a cap would naturally wear after years of handling.
This chapter explains, in general terms, why some fabrics distress well, the families of methods used to create the look, why one of them is contested, and how to care for a cap that is supposed to look damaged without letting it actually fall apart. It does not give instructions for distressing hats at home with power tools or chemicals.
Why cotton and denim distress well
Distressing works best on fabrics where colour and structure are uneven through the thickness of the cloth. Denim is the classic example. As Encyclopaedia Britannica explains, denim is a cotton twill woven with a coloured warp, traditionally indigo, and an undyed weft. The coloured threads dominate the face of the fabric, and the pale threads are mostly hidden. Rub away the surface and pale threads appear; cut an edge and the warp threads break while the weft threads hang loose in a white fringe.
Cotton twill and canvas in other colours behave in a similar way. Cotton is a plant fibre that frays readily at a cut or worn edge, and many cotton dyes sit near the surface of the yarn, so abrasion and washing lighten the colour on edges and high points first. Smooth synthetic fabrics, by contrast, tend to fuzz or melt rather than fray cleanly, and felt has no weave to reveal, which is why distressed finishes are mostly found on cotton caps.
How the look is produced
Manufacturers use several broad families of technique. The descriptions below are general industry practice rather than a single documented standard, and a finished cap often combines more than one.
| Family | What it does | What it looks like |
|---|---|---|
| Hand abrasion | Workers rub chosen areas with abrasive paper, pumice or files | Controlled scuffing and fraying on peak edges and panel seams |
| Cutting and picking | Small cuts are made and threads are picked loose | Deliberate rips and fringes in set places |
| Tumble washing | Sewn caps are washed with abrasive material such as stones or synthetic balls | All-over softening and fading, worn seams and edges |
| Enzyme washing | Enzymes in the wash break down surface fibres of cotton | Softer handle and a faded, slightly uneven surface |
| Chemical fading | Bleaching or oxidising agents remove colour | Lighter patches, mottling or an all-over washed-out tone |
| Laser finishing | A laser marks the surface to remove dye in a set pattern | Repeatable fading and wear marks without hand abrasion |
| Abrasive blasting | Grit is blown at high speed against the fabric | Strong surface fading, especially on denim |
Each method weakens the fabric to some degree, because removing colour or fibre from the surface also removes some of its strength. A distressed cap starts life with less material at its edges than a plain one, which is why care matters more for it.
Methods with a worker-safety problem
Abrasive blasting is the method that has attracted the most concern. The US Occupational Safety and Health Administration identifies abrasive blasting with sand as one of the activities that can expose workers to respirable crystalline silica, very small particles that can cause silicosis and other serious lung disease. The hazard comes from the dust created when silica-containing material is blasted, not from the finished garment, so a sandblasted cap is not a risk to the wearer. The risk falls on the people doing the work.
Because of that hazard, hand abrasion, enzyme washing and laser finishing are often described as alternatives to sand blasting, though each has its own handling and safety requirements. This handbook cannot tell you how any particular cap was made, and labels rarely say. If the question matters to you, the only practical step is to ask the seller about finishing methods, and to treat general claims with the same care you would treat any other marketing statement.
Made-worn and actually worn
There is a difference between a cap that was distressed in a factory and one that has worn naturally over years. Natural wear follows how you handle the cap: the peak edge where you grip it, the front panel where your thumb rests, the crown where it rubs in a bag. Factory distressing follows a pattern chosen in advance. Neither is better; they simply age differently. A factory-distressed cap will continue to wear in the same places it was distressed, because those places are now the weakest.
Fading from light is a separate process. The Canadian Conservation Institute explains that light, and ultraviolet radiation in particular, fades dyes and weakens fibres, and that this damage builds up over time and cannot be undone. A cap left on a sunny shelf will fade on the side facing the window. Some people like this; if you do not, store distressed caps out of direct light like any other.
Caring for a ripped cap
Most hats do not have to carry a care label in the United States: the FTC's guidance on the Care Labeling Rule treats items worn only on the head, hands or feet as outside the rule. Where a distressed cap does carry care instructions, follow them. Where it does not, these habits are general practice for keeping the finish without letting the damage spread:
- Spot clean first. Every full wash removes a little more colour and loosens frayed threads. Clean the sweatband and visible marks before you consider washing the whole cap.
- Wash by hand, cool and gentle. Machine agitation is the fastest way to turn a deliberate fray into a large hole. If you must use a machine, a mesh laundry bag and a gentle, cold cycle reduce the strain.
- Wash dark distressed caps alone. Faded areas show that dye can move; some of it will move into the water.
- Do not tumble dry. Heat and tumbling both stress weakened edges. Dry the cap in shape, as chapter 06 describes.
- Trim, do not pull. Snip long loose threads with small scissors close to the fabric. Pulling a thread can unravel a row of weave.
Worked example
An imaginary reader notices that the frayed edge of their cap's peak has grown from a few millimetres to a wide fringe after several machine washes, and the stiffener is starting to show. They switch to spot cleaning only and put a line of stitching just inside the fray, which stops the loss without hiding the worn look.
Stopping a rip from spreading
A distressed area becomes a problem when it starts growing. Common signs are a fringe that gets longer after each wash, a hole that has started to run along the weave, or a peak edge where the insert is becoming visible. The general approaches are:
- A stay stitch. A line of small running or straight stitches just inside the frayed area, in a matching thread, stops the weave from unravelling further while leaving the fray visible.
- An inside patch. A small piece of similar fabric placed behind a hole and stitched around it supports the area from behind. Iron-on patches use heat and adhesive, so they suit cotton but not synthetics or heat-sensitive trims.
- Fray-stopping liquid. Clear sealants for fabric edges exist, but they can stiffen or darken the fabric, so try them inside the cap first.
The aim is a cap that looks worn and stays whole. A rip that is managed early is easy to keep; one left to grow will eventually take the peak or a panel with it.
Next chapter: Care labels and symbols: reading the tag inside a hat